|
EDITING YOUR PLAYER
MODELS ICONS
|
|
NOTE: I will
be creating a 'Beachcomber' player model, Substitute your own choice of model in
place of 'Beachcomber'. |
| |
|
|
|
Run the PSP7 Installation
file
paint-shop-pro-7.00ev.exe |
|
Unzip the wal plugin and place it in PSP7's 'plugins\formats'
folder, default location
C:\Program Files\Jasc Software Inc\Paint Shop Pro
7\Plugins\Formats |
|
Unzip the quake2 palette and place it in PSP7's
'palettes' folder, default location
C:\Program Files\Jasc Software Inc\Paint Shop Pro
7\Palettes |
Your models base skin icon will consist of three parts:
| Beachcomber_i.pcx |
Low resolution icon for software mode |
| Beachcomber_i.wal |
Wal file for resizing reference only |
| Beachcomber_i.tga |
High resolution icon for gl mode |
NOTE: You must have the same three parts for each skin you
make for your model (CTF icons are provided later)
After you have installed PSP7 and the plugins and palette,
navigate to your new player folder and open beachcomber_i.pcx in PSP7
You will find a 32 by 32 pixel 256 color picture (of whichever character you
copied the icon from)
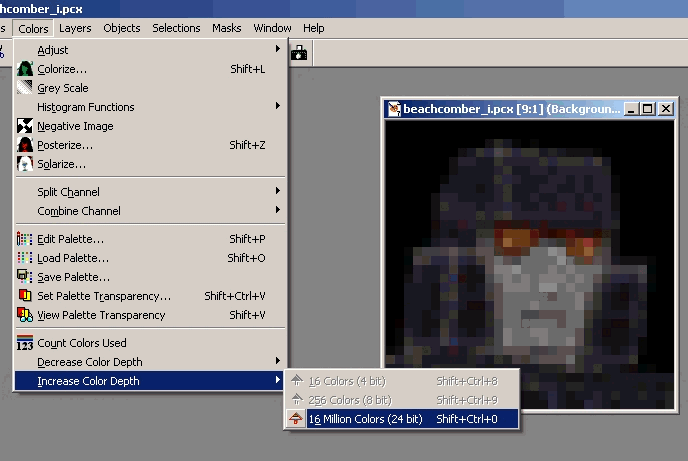
Increase the images color depth by going to Colors->Increase Color Depth->16
Million Colors (24bit)
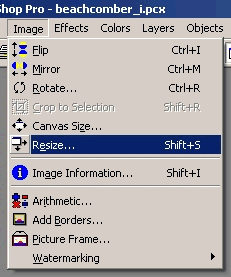
Next we are going to resize the image upwards to create our high resolution icon
goto Image->Resize
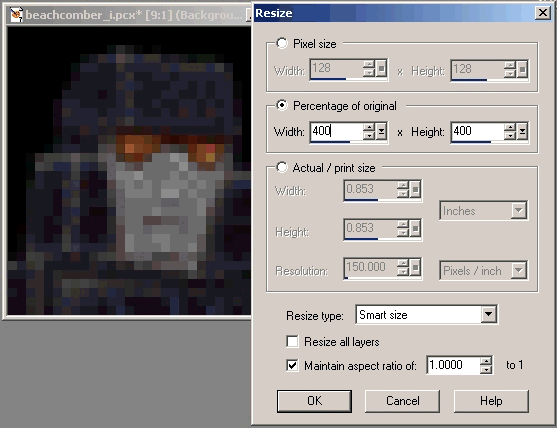
Select 'Percentage of original' and enter 400 (as a rule of thumb all our high
resolution textures are 400% bigger then the pcx or wal original)
Ensure that the 'Maintain aspect ratio' box is checked, (this will give us a 128
by 128 pixel 24bit [32 with alpha] image)
Now we load our box art into the same PSP7 window (drag and
drop works if you have downloaded the boxart image)
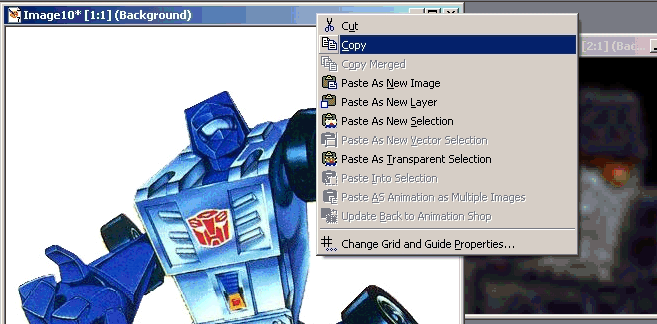
Right Click on the images 'title bar' and select 'Copy'
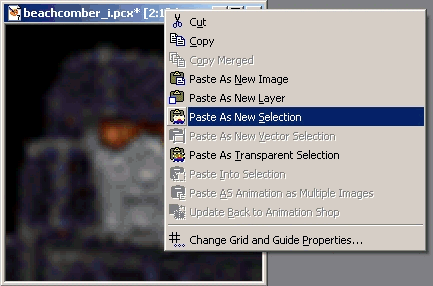
Next highlight your icon image by clicking on the 'title bar' then Right Click
on it and select 'Paste as new selection'
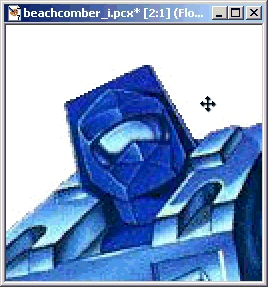
Using the 'Move Tool'
 move your pasted selection until the head is nicely framed
(you may have to sometimes resize your pasted selection to get the right fit!)
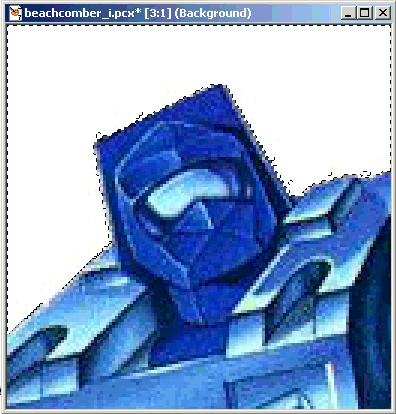
Using the 'Magic Selection Tool'
 'Left Click' on the white area, and it will all be selected
The edges of the selection are a little rough so we are going to clean it up
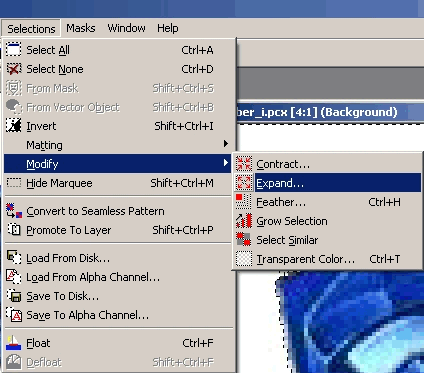
Goto Selections->Modify->Expand
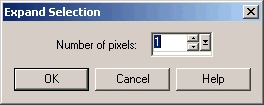
And set it to 1 pixel and clik OK
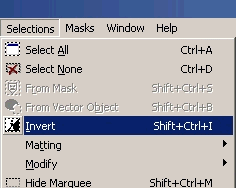
Then goto Selections->Invert
(This inverts the selection and selects the face instead of the white space)
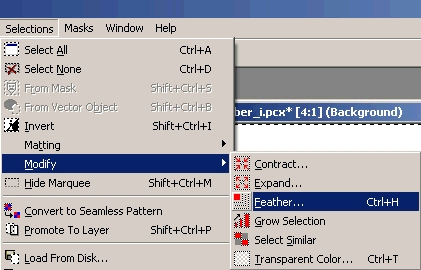
Next goto Selections->Modify->Feather
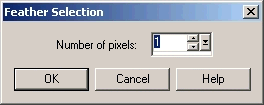
Set it to 1 pixel and click OK
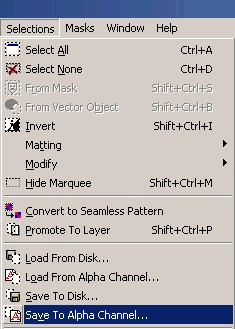
Next goto Selections->Save To Alpha Channel
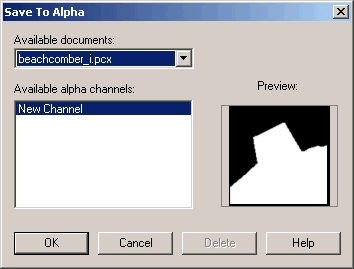
Click OK
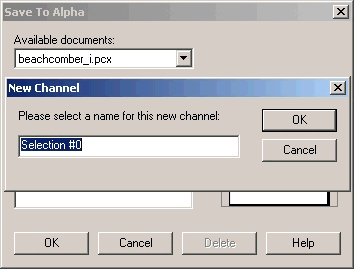
Click OK (The name is not used in TFQ)
Its looking a little grainy so we will smooth it out a little
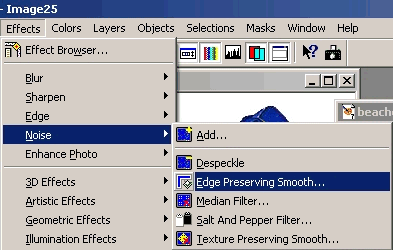
Goto Effects->Noise->Edge Preserving Smooth
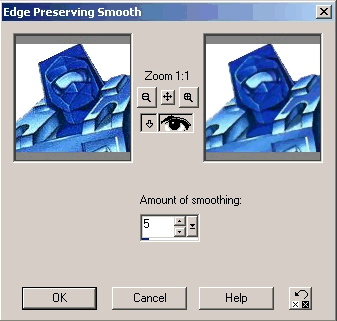
Set it to between 2 and 5, click the arrow down next to the eye to see the
effects on your image before okaying it
when you are happy click OK
Next we want it to look really good in the menu so we are
going to adjust the contrast a little

Goto Color->Adjust->Brightness/Contrast
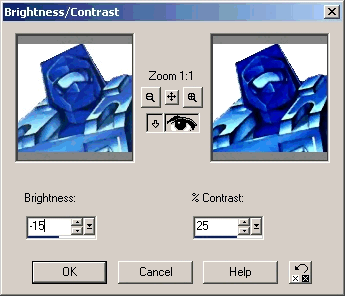
I usually give it +25 contrast and take the brightness down a little so its not
too shiney,
When you are happy with the result click OK
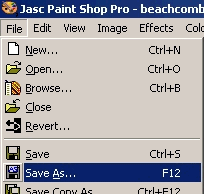
Now goto File->Save As
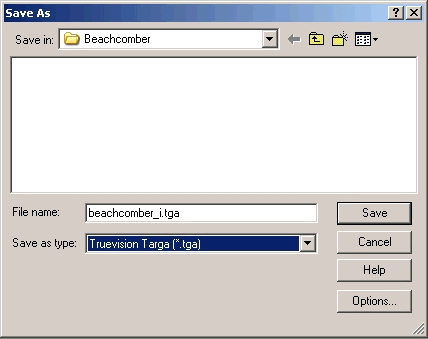
Select 'Truevision Targa (*.tga)' as the type make sure the name is correct .tga
(all this time it said .pcx) and hit 'Save'
Thats our High resolution icon file done!
But we still need to do a low resolution pcx file for those who can't run high
resolution.
You should still have your nice high resolution image open in
PSP7 and still have the selection around the face,
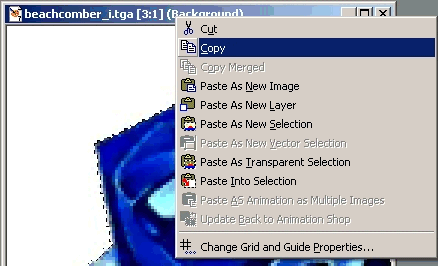
First right click on the 'title bar' of your icon image and select 'Copy', we'll
need that in memory for later,

Invert the selection (it will look 'off' but this is because of the feathering
we did earlier and will not show when filled)
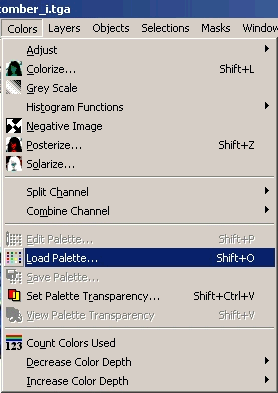
Now goto Colors->Load Palette...
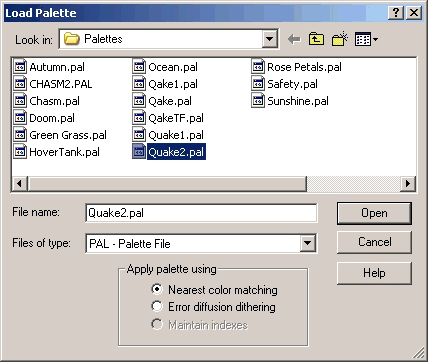
Select the Quake2 palette (mine I named Quake2.pal, imagine that?) and hit Open,
(your icon will look really blotchy but don't worry we will fix it)
Right now we need an EXACT color from the quake2 palette
(this is the color for transparency in quake2 icons (pcx format only, tga's use
the alpha channel)
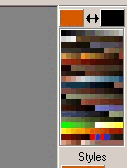
Select the 'Flood Fill Tool'
 and move over to the color selection box on the right (which now shows the
Quake2 palette)
While over the color box the 'flood fill tool' will automatically change to a
dropper so you can select the color you want,
select the VERY LAST COLOR (all those last few look the same but we want the
LAST ONE!)
Red:159 Green:91 Blue:83, left click on it with the dropper and it will become
the primary color for flood filling.
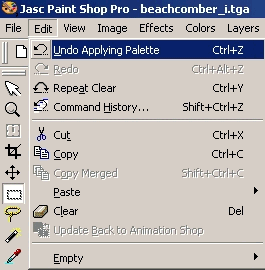
Now we want to UNDO the palette so we goto Edit->Undo 'Appling Palette'
(it always gives the name of the last action so its not always this one)
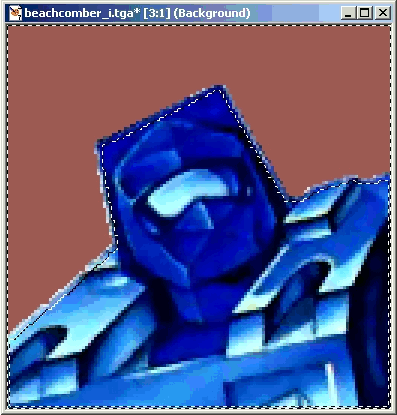
With the 'flood fill tool'
 Fill in the white area
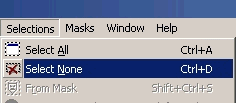
Then goto Selections->Select None
(We are going to resize so we want it ALL resized)
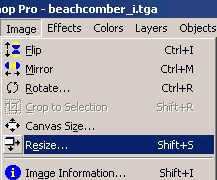
Goto Image->Resize...
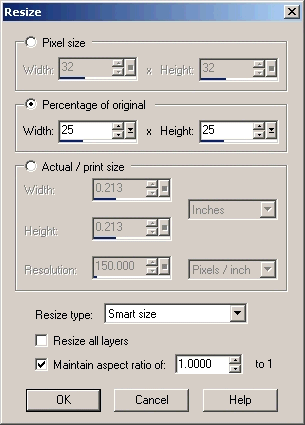
Select 25% of original (maintaining aspect ratio) hit OK
Now we could convert it to the Quake2 palette right here and
call it done, but I like to do a good job even on the software icon
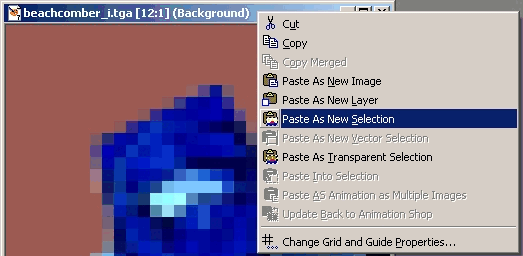
Right click on the 'title bar' and select 'Paste As New Selection'
(thats why we copied it earlier while it was large)
When you paste it, it of course won't fit so left click on the image to drop the
selection
and goto Image->Resize...

select about 40% and hit OK
Then Move the image around until the face is nicely framed
left click the image ONCE to drop the selection there
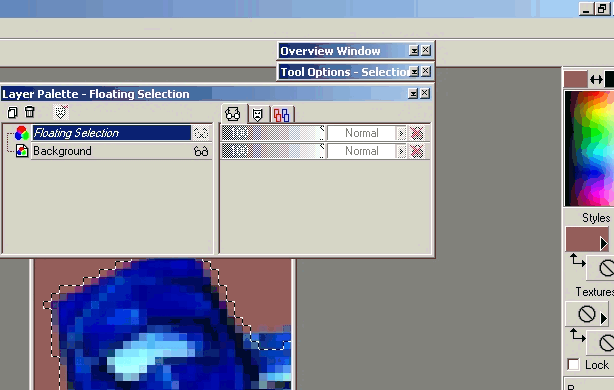
Scroll over the 'Layer Palette' toolbar until it expands, it shows the 'floating
selection'
right click on the 'floating selection' and select 'promote to layer'
Next left click on 'background' goto Selection->Select All
Press 'Delete' on the keyboard then
Select the 'flood fill tool' and fill it with the transparent color!
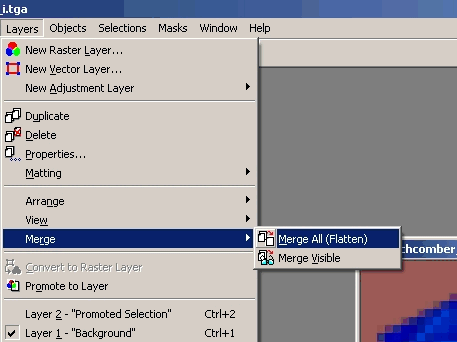
Then goto Layers->Merge->Merge All (Flatten)


Now load the Quake2 Palette again
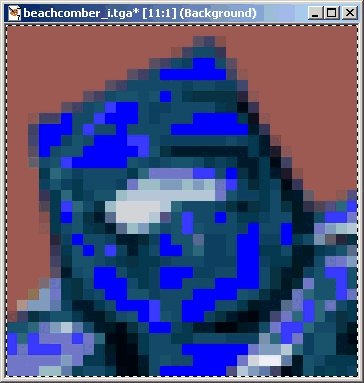
Your image should look like this:
Now we are going to fix those blotchy parts, to do this we will use the 'Color
Replacer Tool'

Select the 'color replacer tool' and HOLD DOWN CTRL while hovering over the blue
blotchy areas
This allows you to select that color (so 'right click' on the color you want to
replace and 'left click' on a color nearby)
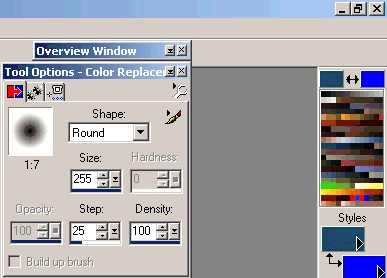
Now hover over the 'Tools Options Toolbar' and set the size to 255 and the
density to 100
go back to your image and left click on it, all the blotchy color should now be
replaced

Repeat with any other colors that you need

Once you are happy goto File->Save As

Make sure the name is correct (it should be .pcx now)
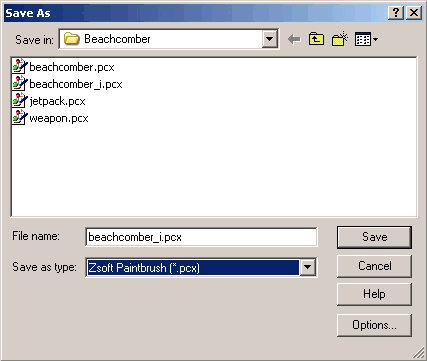
Select Zsoft Paintbrush (*.pcx) as the type and hit Save
It will ask you if you want to replace the file, click YES
and it will tell you that due to the format no alpha channel will be saved,
click OK
(we don't need alpha channels in pcx format)
HERES THE FINISHED ICON IN HIGH & LOW RESOUTION
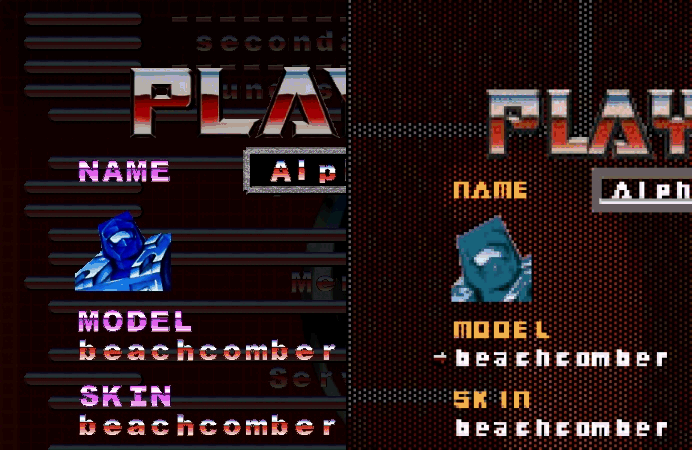
The TGA uses the 'alpha channel' to define its transparency while the PCX uses
the 'last palette color'

Tutorial by G. Civita,
2009.
Design by Rikki Knight,
2000.